- General
- Accessing Reach and Gauge Maps
- Single Reach Maps
- Composite Reach Maps
- Gauge Maps
- Map Controls
- Key to Symbols
- Right Panel
- Accessing Reach and Gauge Maps
In this context, the terms "run" and "reach" are used interchangeably; both mean a specific section of some river or stream that is typically paddled during a single trip.
A Reach Map is a map showing put-in, take-out and gauge locations for a run so you can visually locate them, and also see the relationship between them. There are two kinds. Single Reach Maps show the locations for a single run and a single gauge for that run. Composite Reach Maps show the locations for either multiple runs, or for a single run with multiple associated gauges.
Gauge Maps are really just Reach Maps, but displayed/oriented so that the location of the gauge is highlighted.
All these maps are accessed from the Cross-Listing pages, as discussed in the next section.
Accessing Reach and Gauge Maps
Let's say you want to display reach maps associated with the Chili Bar gauge on the South Fork American river in California, and you're particularly interested in the Chili Bar run. But let's say you're also interested in the location of the Chili Bar gauge, perhaps because you want to see its relationship to the Chili Bar run, perhaps because you want to visit the gauge to take a reading on the day you paddle.
All the above are accessed from the relevant Cross-Listing page. There are multiple ways to get there:
- From a flow report page. In this case, on the Realtime page, navigate to the So. American - At Chili Bar entry, and click on the first (brown) link under So. American. This takes you to the So. American - At Chili Bar entry on the cross-listing page.
- Navigate directly to the Cross-Listing page and search for Chili Bar. To do this, click on the Xlist link in the gray menu bar at the bottom of any Dreamflows page, select the California link, then navigate to the So. American - At Chili Bar entry.
- If you don't know which river the Chili Bar run is on, which gauge serves it, or which state it's in, proceed as follows. Click on the Alpha link in the gray menu bar at the bottom of any Dreamflows page. This takes you to the Alphabetical Listing index page. Click the All States link to get to the All States Alphabetical Listing page. This lists all reaches for all gauges in all states reported by Dreamflows. Search (using your browser's search capability) for Chili Bar. Locate the South Fork American River - Highway 193 to Coloma (Chili Bar) entry, and click on the corresponding So. American - At Chili Bar entry in the Gauge Location column. This takes you to the So. American - At Chili Bar entry on the cross-listing page.
However you get there, the South Fork American River - Highway 193 to Coloma (Chili Bar) run is listed under the So. American - At Chili Bar gauge entry.
To access, click on the  symbol next to the run of interest (if there are multiple run entries, choose the one listed under the gauge you want).
This option displays a reach map for only the specified run and the specified gauge.
So, a given run may have multiple Single Reach maps, one for each gauge that serves it.
The following is a snippet of the Chili Bar reach map:
symbol next to the run of interest (if there are multiple run entries, choose the one listed under the gauge you want).
This option displays a reach map for only the specified run and the specified gauge.
So, a given run may have multiple Single Reach maps, one for each gauge that serves it.
The following is a snippet of the Chili Bar reach map:
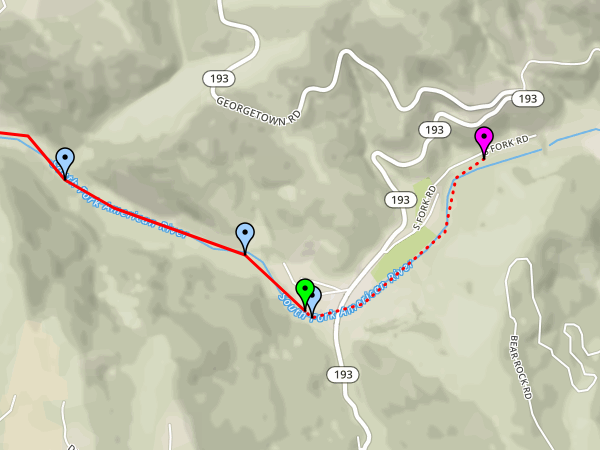
The gauge (purple balloon) is a little upstream of the put-in (green balloon), and connects with the put-in via a dotted line.
Rapids (Chili Bar Hole, Bed and Breakfast, Meatgrinder, all blue balloons) are scattered above and below the put-in.
Note that the put-in shown is the beach where the majority of paddlers put in, but many paddlers put in above here and run Chili Bar Hole
(i.e. the displayed put-in is a suggestion, not a rule).
Because this is a Single Reach map, the track is red.
As you can see, this run generally goes west.
The following is a snippet of the Lower Clavey reach map:

The purple dots draw attention to the fact that the Lower Clavey run continues on the Main Tuolumne, which may increase flow a lot.
Also, the tracks show that this run initially goes south, then south-east to Hunter Bend, then west to the confluence with the Tuolumne.
Zooming in will show that parts of the run are quite remote.
To access, click on the  symbol next to the run of interest.
This option displays a map with either multiple runs, or a single run with multiple gauges.
This groups gauges and runs that are associated with each other in some meaningful way, e.g. by drainage,
allowing you to more easily see their relationship to each other.
In general each run appears on only one Composite Reach map.
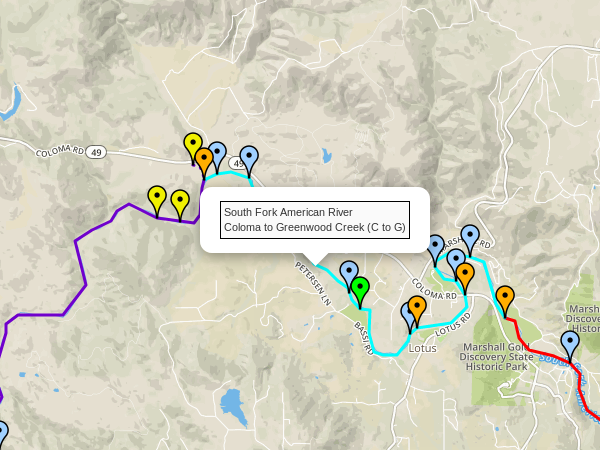
A snippet of the Lower SF American River, Weber Creek Composite reach map:
symbol next to the run of interest.
This option displays a map with either multiple runs, or a single run with multiple gauges.
This groups gauges and runs that are associated with each other in some meaningful way, e.g. by drainage,
allowing you to more easily see their relationship to each other.
In general each run appears on only one Composite Reach map.
A snippet of the Lower SF American River, Weber Creek Composite reach map:
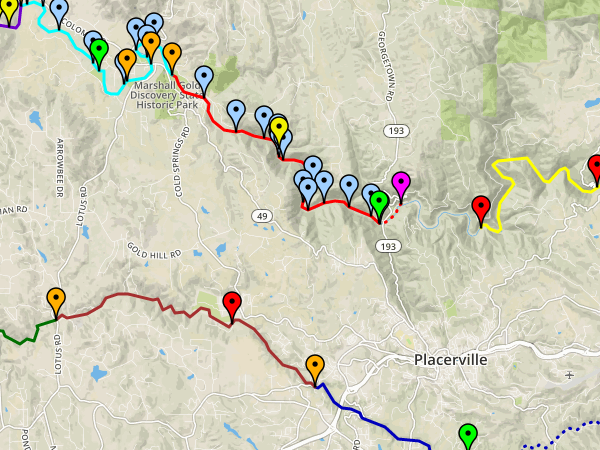
In this case, the actual map shows the South Fork American from Slab Creek Reservoir down to Folsom Reservoir (five runs), and also three runs on Weber Creek.
The above snippet doesn't show all that, but does show many of the runs, in particular Chili Bar (red), C to G (cyan), and middle Weber Creek (brown).
To access, click on the  symbol just under the gauge name on the cross-listing page (under So. American - At Chili Bar in this example).
This displays a map showing the location of the specified gauge.
A snippet of the Chili Bar gauge map:
symbol just under the gauge name on the cross-listing page (under So. American - At Chili Bar in this example).
This displays a map showing the location of the specified gauge.
A snippet of the Chili Bar gauge map:
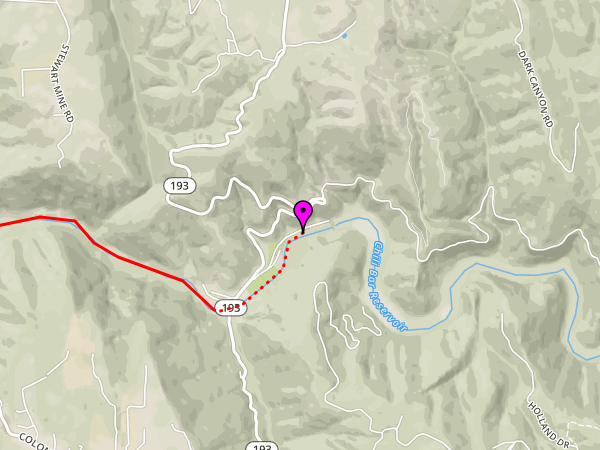
The purple balloon shows the gauge location.
The nearest reach (in this case the Chili Bar run) is also shown.
Note that this map is really just a Reach Map, but displayed/oriented so that the location of the gauge is highlighted.
By default put-ins, take-outs, rapid locations and landmarks are turned off, but you can use the controls in the right panel to turn them on.
To move the map around, left click on the map and drag it using the mouse, then release the mouse button.
To zoom in and out one level, use the + and - buttons in the top left corner of the map. To zoom in and out more aggressively, use the +5 and -5 buttons.
To change the base map view (from say roadmap to satellite), hover the mouse over the stacked-layers icon in the top right corner of the map and make a new selection.
Hover the mouse pointer over a marker (balloon) to get more information about it, for example:
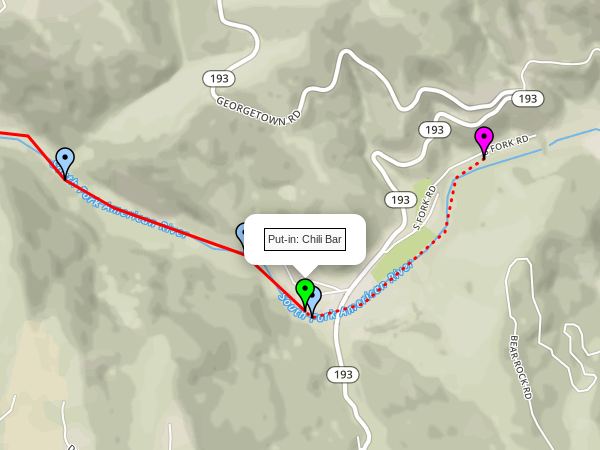
To close the popup box, move the mouse.
Click the mouse pointer on a balloon to get even more information/options, for example:
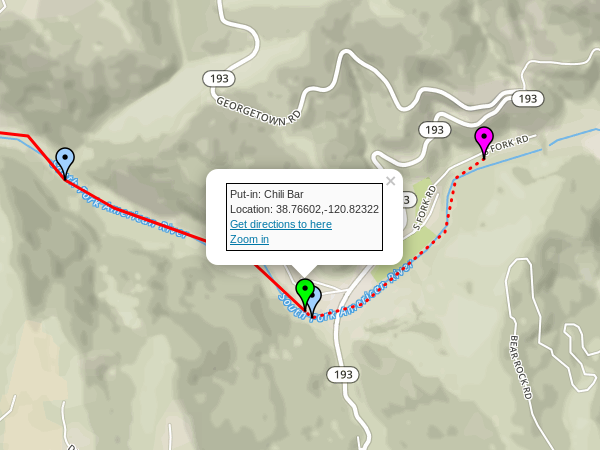
The location of the marker is now displayed in the popup box, which persists even when you move the mouse away.
Options are as follows:
- If this is a gauge balloon, clicking on the View hydrograph link opens a graph showing recent flows in a different browser tab/window.
- Clicking on Get directions to here opens Google Maps for directions to that location in a different browser tab/window. The From (first) address field in Google Maps will be populated with the From Location box value, discussed in the the Right Panel section.
- Clicking on Zoom in puts that balloon in the center of the map and zooms to an appropriate level. The label changes; click on Zoom out to go back to where you came from.
- To close the popup box, click the X button in the top right corner of the box, or click on the map itself.
Hover the mouse pointer over a track to get the name of the reach (though it can sometimes be hard for the mouse to locate the track exactly).
For example:
To close the popup box, move the mouse.
At this time, clicking on a track does nothing interesting.


The Marker Key section lists the possible balloon colors:
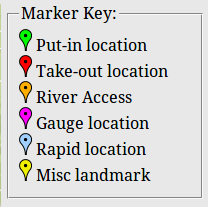
See the Key to Symbols section for detailed information on each icon type.
The From Location section allows you to enter a city or street address, for example:
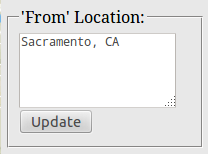
This address is used as the default From address when getting Google Map directions to a balloon location, see Map Controls.
No error checking is done by Dreamflows - if you enter junk, Google Maps will use that junk as the From address.
To change the value, edit the field and click the Update button.
The From Location address is saved in a cookie in your browser, so it's remembered from visit to visit. This means that you'll need to set From Location separately on each computer that you use, or in each browser on the same computer.
The Select Markers section allows you to control which balloons and tracks are displayed:
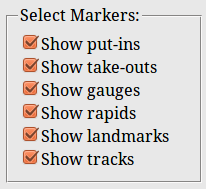
The check-boxes should be self-explanatory except:
since river access points are considered both a put-in and take-out, they too are displayed if either Show put-ins or Show take-outs is checked.
- Show put-ins: both and balloons are displayed when this is checked.
- Show take-outs: both and balloons are displayed when this is checked.
- Show gauges: balloons are displayed when this is checked.
- Show rapids: balloons are displayed when this is checked.
- Show landmarks: balloons are displayed when this is checked.
- Show tracks:
,
and
tracks are displayed when this is checked.